

DIY Halloween bat lantern

This post contains affiliate links.
While I have been getting excited for Christmas season already, my kids have been talking about Halloween 24/7 for the past week. I pulled out their Halloween PJs, so I guess that is what got everything started. My 2-year old does not really even know what Halloween is, but his older sister is excited and tells him all about it, so he is excited too. I also started talking with both kids, especially with my two year old tho, about all things Halloween to get him familiar with the season. This, in combination with some other preparations, will later guarantee us a meltdown free trick-or-treating experience.
Today was a bit of a rainy day here so I thought why not make a Halloween craft. This Halloween bat lantern was the perfect craft for an impromptu craft afternoon. It is easy, does not make a huge mess, does not require many materials and my 2- and 4-year old were both able to participate. My 4-year old helped cut out all the pieces we needed and glued everything together. My 2-year old had a blast painting the milk carton black. We overall had a really fun craft afternoon together. Make sure you also take a look at these fun and engaging Halloween crafts for kids and get ideas for more seasonal fun.
I had never made this before and I am super happy with how it turned out. We put it on a shelf by the window in your living room so we can see it lit up at night and people walking by on the outside can enjoy it as well.
Here is what you need
Empty milk carton (in whatever size you want your bat to be, I used a 1.5 L carton)
Card stock in black and white
Tissue paper in white and a color of your choice
Scissors
Black acrylic paint
Here’s what you do
1. Remove top from milk carton
Cut around the top edged of your milk carton to take the top off. Wash and dry the carton thoroughly. The side you cut open will be the bottom of the lantern.

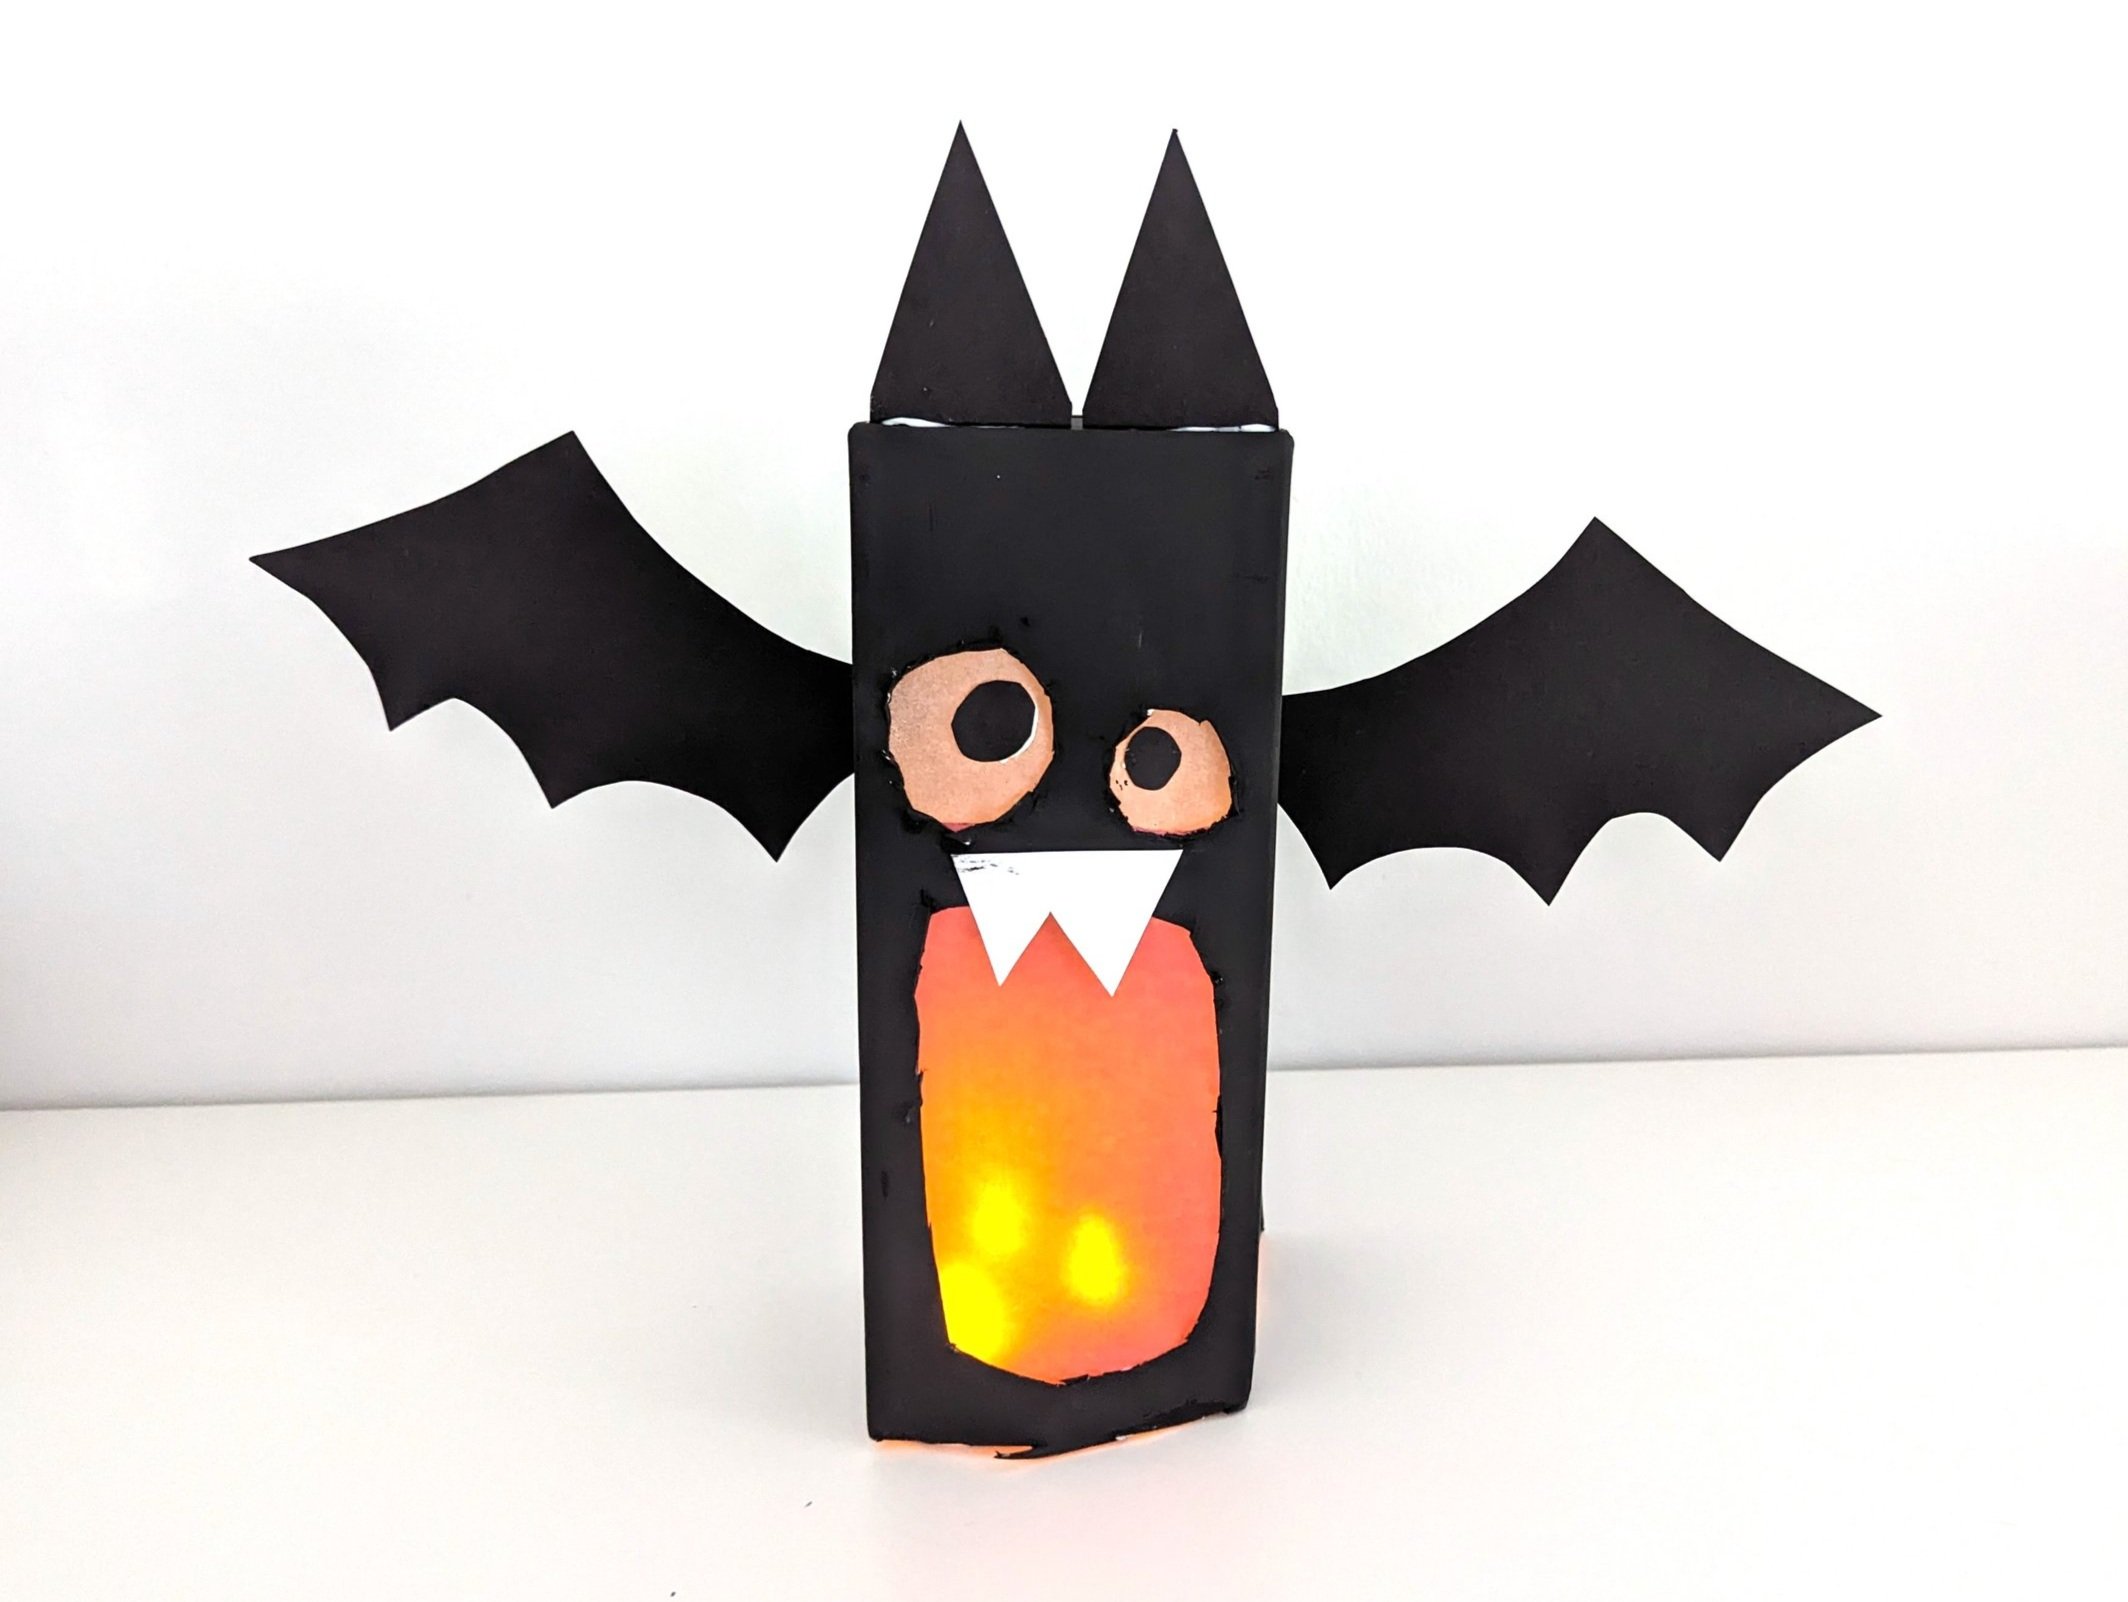
2. Cut out the bat’s eyes and belly
Cut a big opening into one side of the carton for your bat’s belly. You want to make the belly fairly big, so a lot of light can shine through. Afterwards cut out two round circles above the belly for the eyes. We decided to cut out two different size circles to make the bat look silly. Leave some room between belly and eyes for the bat’s teeth.
3. Paint the outside of the carton black
Use the black acrylic paint (or any other paint that will adhere to the carton permanently) to paint the entire outside of the carton. Let it dry completely.


4. Cut out wings, teeth, ears and pupils
While you wait for the paint to dry cut two wings out of black card stock as well as two small circles that will be your bat’s pupils and two pointy triangle shaped ears. For the teeth use white card stock and cut out a double triangle like shape. You can either draw the outlines and have your kids cut it or do it for them, depending on their age and cutting skills.

5. Cut two rectangles out of the tissue paper
Cut one larger rectangle out of a colored tissue paper. It need to be big enough to cover the opening for the bat’s belly. Make it a bit bigger than the cut out so you have space to put glue. Do the same for the eyeballs with the white tissue paper.

6. Glue everything together
Glue the cut out triangles to the top of the milk carton to form the ears. Then put glue around the edges of your tissue paper cut outs and glue them into the inside of the carton behind the openings. Add the 2 small dots as pupils to your eyes and glue the teeth just below the eyeballs.
7. Attach wings
You can either glue the wings to each side of the carton or use pointy scissors or a knife to make two small openings on each side and just slide the wings in.
8. Add lights
Turn on your battery powered tea or fairy lights and put the bat over them. If you have younger kids make sure the lights are out of reach or get lights that have battery cases that can be screwed shut. Children should never be unsupervised near batteries, especially button batteries, as they can be fatal when swallowed.
Have fun crafting!

